Banish Razor Bumps By Waxing Your Armpits (& You Can Do It At Home)
We may receive a commission on purchases made from links.
Shaving, waxing, and epilating — the options for hair removal are endless. However, most of these methods typically leave you with painful nicks and irritated bumps — not to mention the traumatizing experience of developing ingrown hairs in sensitive places, such as your underarms. The delicate skin of your armpits is prone to sensitivity and irritation, so being mindful of the hair removal method you choose can make a world of difference. If you wish to finally say goodbye to the razor bumps, cuts, and ingrown hairs then make the switch to waxing and save yourself from future discomfort.
The best part about waxing is that you can stretch the gap in between wax sessions, whereas with shaving the hair simply grows back in a few days. The hairs take longer to grow if you wax, as waxing removes hair directly from the root. Because of that, it takes time for the hair to regrow from the follicle. Shaving, on the other hand, only trims the part of the hair that is visible from the top layer of your skin. The follicle itself remains, which allows the hair to grow at a faster rate than if you were to remove the hair from the follicle entirely. Although waxing appears daunting at first, most people don't ever look back after making the switch. Here are some easy tips for waxing your armpits from home — and putting a permanent end to razor bumps and cuts.
Wait it out
Rather than waxing as soon as you notice hair growth (as you would with shaving), let your hair grow out for several days. Wait until your hairs are approximately one-fourth of an inch in length, per Healthline. If you shave, then your hair should be as long as a grain of rice (which takes anywhere between one to two weeks to grow).
That said, hair grows at different rates for each person. If your hair looks closer to knuckle-length, as opposed to a grain of rice, make sure you trim the hairs prior to waxing. To trim near the underarms, use small brow scissors — not regular household scissors — or an electric hair clipper for precision.
On another note, try to avoid your waxing session before and after your period, as your skin may be more sensitive during this time. Pain receptor activity increases surrounding menstruation, which can lower your pain threshold and make waxing more uncomfortable than necessary.
Prepare for waxing
Leading up to your wax, try to exfoliate two or three days beforehand to prevent ingrown hairs (via Zensa Skin Care). A gentle exfoliating mitt works great, but avoid harsh scrubs. You do not, however, want to exfoliate on the day of your at-home waxing sesh, as this will increase sensitivity and irritation. You should also skip the deodorant and antiperspirant on the same day as they clog pores and make it difficult for the wax to grip the hairs. Other activities to avoid include consuming caffeine or alcohol before waxing. According to the Mayo Clinic, caffeine and alcohol function as diuretics, which constrict the pores. This can make it more difficult and painful to remove hairs from the follicles.
The only drawback to waxing is the discomfort that comes with every pull of the waxing strip. Expect some discomfort, though everyone possesses different levels of pain tolerance so you cannot rely on another person's experience in this case. Take a pain reliever thirty minutes prior to waxing to reduce discomfort, if you must.
The last step to prepare for waxing involves collecting supplies. At-home waxing kits are easy to find. If you purchase a kit, make sure it includes the basics — wax pellets, applicator sticks, and an electric wax warmer. For the sensitive skin girlies out there, look for a hypoallergenic wax and consider using hard wax. It's gentler than soft wax, as it only sticks to hair and not the skin (via Healthline).
How to wax
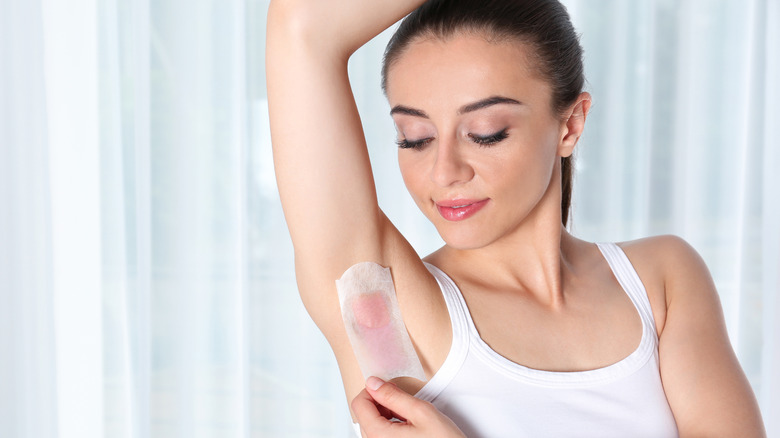
Now, it's time for the fun part. To get started, heat the wax while you clean and prep your skin. Firstly, apply baby powder to your underarms to absorb excess moisture and prevent the wax from sticking to your skin, per SecretSpa. Once the wax melts, use an applicator to spread the wax in the direction of hair growth or, in other words, with the grain. Secondly, take your wax strip and gently smooth it against the wax. While keeping your skin taut, pull the strip in the opposite direction of hair growth (or against the grain) in one swift motion. Removing hairs in the opposite direction prevents ingrown hairs.
It's important to keep in mind that hair in the underarm region grows out in two different directions. You should take a look at the natural direction of the hair before you apply the wax, per Veet. For those with sensitive skin, try not to wax over the same spot multiple times, as repetitive pulling can cause irritation. To avoid going over the same area, use tweezers to remove any stragglers.
Aftercare
When you finish, you may notice redness and bumps from irritation. Apply a serum or gel that contains soothing ingredients, such as aloe vera or calendula. You don't want to clog the pores immediately after waxing, so avoid antiperspirant and deodorant. After waxing, the skin will be sensitive for several hours so avoid alcohol-based toners and exfoliators for one to two days. Your gym plans will also have to wait as sweating can increase the risk of infection, especially since your pores remain open after waxing, but you can resume physical activity after twenty-four hours. Essentially, you want to baby your skin for several days after waxing.
In terms of maintenance, it is safe to resume exfoliating after a few days — as long as the irritation has subsided. Once you begin waxing, gentle exfoliation twice per week should become routine for the prevention of ingrown hairs. Stop exfoliating several days prior to your next wax. That will typically land anywhere between two to six weeks out, depending on your individual growth cycle.


